How to make a template measurement
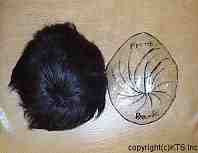
How to make a template from an existing hair system
Making a template is very easy and can be done on your own. There are also many videos on YouTube etc that also show you how to make your own template as well as the information below.
Any problems or difficulties please feel free to contact us via email and we will be more than happy to help.
Since the key to the success of a hairpiece is its fit, the base must correspond to the patron’s head shape and original hairline recession. Making a tape template of the head which can be seen through and drawn upon is an ideal way to develop a pattern for such a base to make the proper hairpiece.

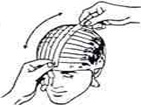
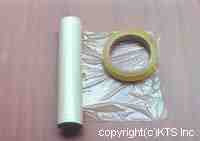
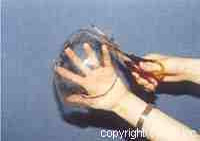
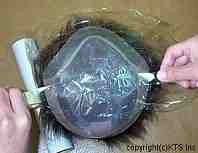
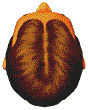
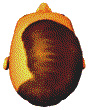
Place an 18-inch square of clear plastic wrap so that it covers the top portion of the head.
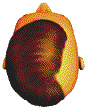
After pressing the wrap close to the head, use tape to contour the head shape.
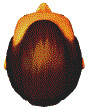
Beginning at the forehead, place transparent tape on the wrap over what will become the outer perimeters of the pattern.
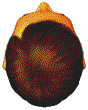
The areas of baldness determine these outer perimeters.
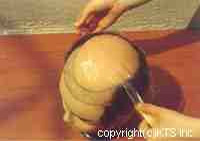
After you have taped the boundaries, cover the inner portion of the plastic wrap with overlapping pieces of tape.
Apply 3 layers of tape.
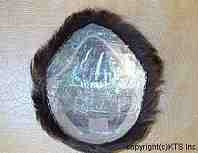
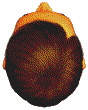
The tape will lock the plastic wrap into a permanent transparent tape template.
Hairpiece Pattern
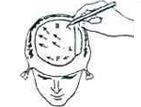
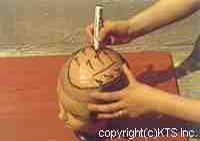
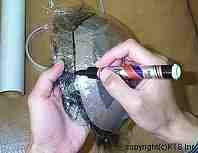
Using a Sharpie permanent marker, draw pattern lines on the tape template while it is still on your head. Though requirements vary from person to person, some rules of thumb apply to most. Front hairline should usually be established by placing 3 or 4 of your fingers (depending on your age) about the brow line. Lines are drawn from that point to form a pattern, which covers the bald area. Deeper recessions look most natural.
After the entire outer perimeter of the pattern is drawn, the desired style should be indicated.
If a part is desired, draw a line from a pivot point at back crown to the front hairline. Placement of the pivot point should correspond to what can be seen of your original growth.
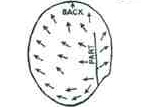
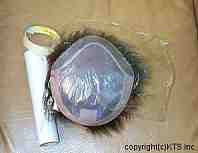
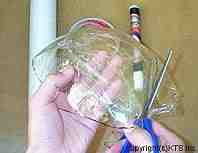
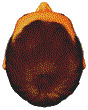
Indicate the probable growth pattern on the tape template, the date the tape template is made, as well as other pertinent information concerning your hairpiece. After you have finished marking the tape template, add one more layer of tape (now 4) to cover and seal in the markings. Since the average life of a hairpiece is 12 to 18 months, good record keeping is advisable to keep the hair piece current. Remove the tape template from your head and trim the excess plastic wrap off.
1. Place an 18-inch square of clear plastic wrap so that it covers the top portion of the head.
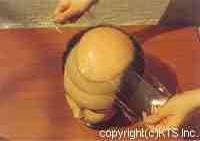
2. After pressing the wrap close to the head, use tape to contour the head shape.
3. Beginning at the forehead, place transparent tape perimeters of the pattern.
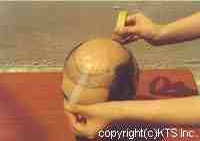
4. The areas of baldness determine these outer perimeters.
5. After you have taped the boundaries, cover the inner portion of the plastic wrap with overlapping piece of tape.
6. Apply 3 layers of tape.
After the entire outer perimeter of the pattern is drawn, the desired style should be indicated.
If a part is desired, draw a line from a pivot point at back crown to the front hair line. Placement of the pivot point should correspond to what can be seen of your original growth.
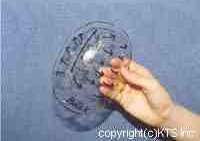
7. The tape will lock the plastic wrap into a permanent transparent tape template.
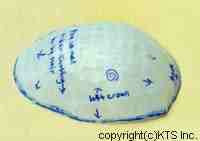
8. Indicate the probable growth pattern on the tape template, the date the tape template is made, as well as other pertinent information concerning your hair piece.
After you have finished marking the tape template, add one more layer of tape (now 4) to cover and seal in the markings. Since the average life of a hair system is 12 to 18 months, good record keeping is advisable to keep the hair piece current. Remove the tape template from your head and trim the excess plastic wrap off.
1. Place an 18-inch square of clear plastic wrap so that it covers the top portion of the used hair piece
2. After pressing the wrap close to the hair system, use tape to contour the hair system shape.
3. Beginning at the forehead, place transparent tape perimeters of the pattern.
4. Lines are drawn from that point to form a pattern, which covers the hair system area.
5. After the entire outer perimeter of the pattern is drawn, the desired style should be indicated.
If a part is desired, draw a line from a pivot point at back crown to the front hair line. Placement of the pivot point should correspond to what can be seen of your original growth.
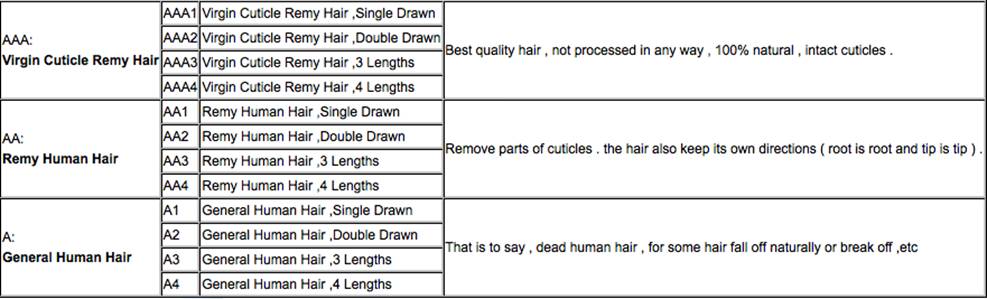
There are 3 main types of hair quality available. Indian, Chinese and European. Each hair type has it own quality however we recommend Indian virgin Remy hair as the best type of hair to be used in Hair systems.
Chinese hair is usually the most common type of hair that is used in Hair systems, simply because it is more readily available in large quantities and does not cost as much to buy.
In our hair systems we prefer to use Indian Virgin Remy hair, as it is the most natural source of hair and cut from healthy young people. The hair cuticle remains in tact and the shine is maintained with little or no processing of the hair. In order to keep the hair natural and tangle free the hair is collected strand by strand and all the cuticles are arranged in one direction thus in the end the hair has good natural sheen and good colour retention.
European hair is also one of the best quality types of hair available. It has all the benefits of Indian Remy hair with the only advantage being the hair shaft of European hair is slightly thinner and thus best suited for people who may have fine hair.
Take a look at the chart below to show why we use the best quality hair - Virgin Remy Hair .
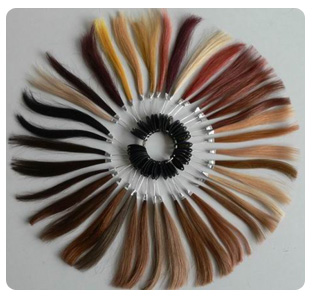
Choosing the right colour is very important in making sure the hair system blends in with your natural hair colour. We can offer all hair colours, standard or custom, grey, highlights etc.
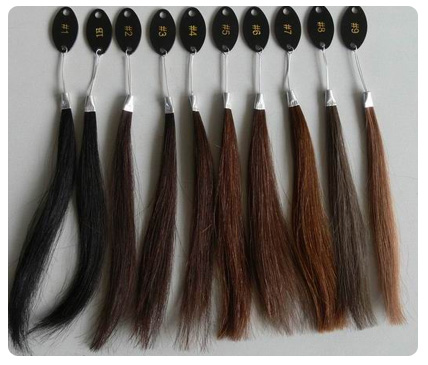
Simply choose the right colour from the chart below, alternatively send us a sample of your own hair by clipping of a few hair strands from the side or back of your hair, bonding them together using celotape so we can match the colour exactly.
1# -- jet black
8# -- light brown
18# -- ash blonde
30# -- auburn
1b# -- natural black
10# -- medium ash brown
20# -- dark blonde
33# -- rich copper red
2# -- darkest brown
12# -- light golden brown
22# -- medium blonde
613# -- lightest blonde
4# -- chocolate brown
14# -- light ash brown
24# -- light blonde
6# -- medium brown
16# -- sahara blonde
27# -- strawberry blonde
Hair density is the amount of hair strands on the head. Generally, it is measured by counting the number of hair strands found in one square inch (2.5cm) of scalp. When a stylist tells you that you have thick hair, it is high density he/she is describing. Generally, the classifications of hair density are thin, medium, and thick, and are unrelated to the texture of the hair. The average head has approximately 2,200 strands of hair per square inch, and a total of approximately 100,000 hairs.
The main consideration of hair density is in styling. Thick hair is well suited to layered styles, while thin hair is often better suited to more blunt styles. People with thin hair often prefer styles with added curl to give an illusion of more hair.
Density is determined by many factors such as Age. A younger person could get away with a higher hair density such as medium- heavy, whereas a more mature man will be best suited for a light- medium light density. Also try and take a look at your own hair on the sides and back and try and match the desnity as this will allow to blend your own hair system with your natural hair.
Please see the chart below on hair densities which will be useful when filling out the customised form.
50% Extra Light
80% Light
100% Medium
130% Medium-Heavy
150% Heavy
180% Extra-Heavy
The next step is to match the correct curl/wave to match your natural hair type. The options available are as follows:-

Body Wave/Straight
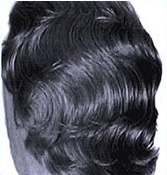
Slight Wave
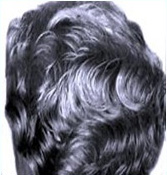
Medium Wave
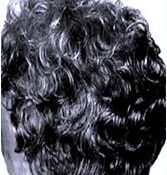
Body Wave/Straight
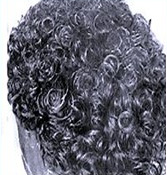
Loose Curl

Tight Curl /Afro
It is best to select the correct hair direction you had prior to your hairloss or alternatively select the appropriate hair direction to match your current hair style or the hair style you are looking to achieve. For me as i had a centre crown and require a style which can be changed and manipulated the best option was the Centre crown option, however the Freestyle option can be selected as the the crown can quite easily be incorporated into the hair system when cut.
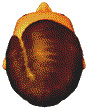
Left Part
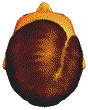
Right Part
Center Part
Left Crown
Right Crown
Center Crown
Left Comb Over
Right Comb Over
Front to Back (Freestyle)